8️⃣Setup Firebase project and Google login
Firebase console: https://console.firebase.google.com/
1. Create a new Firebase project
You will create a new Firebase project for your app and download the google-services.json file to replace the existing one in the source code.
The Firebase SDK already has in the source code, so you will skip this part. Just need only the google-services.json file.
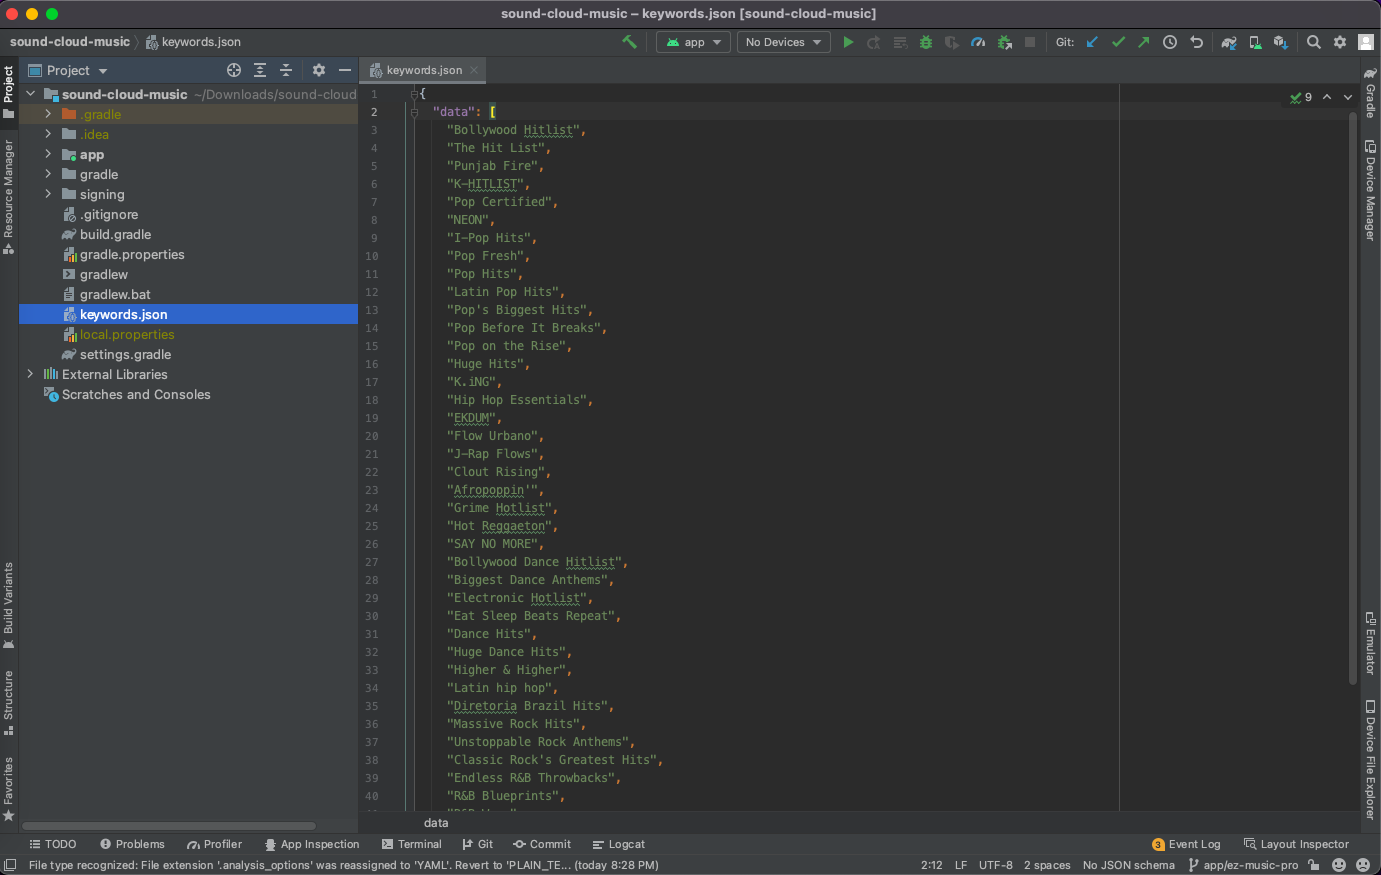
2. Change the suggested keywords on the Search screen
In the source code, you will see the keywords.json file. This file contains the suggested keywords that you will see on the Search screen.
You can change all keywords as you want but please keep in mind, you just change the text only, please keep the data format. If the format is wrong, the app might be not working properly.
Please see this video to know how to upload this file to the Firebase console.
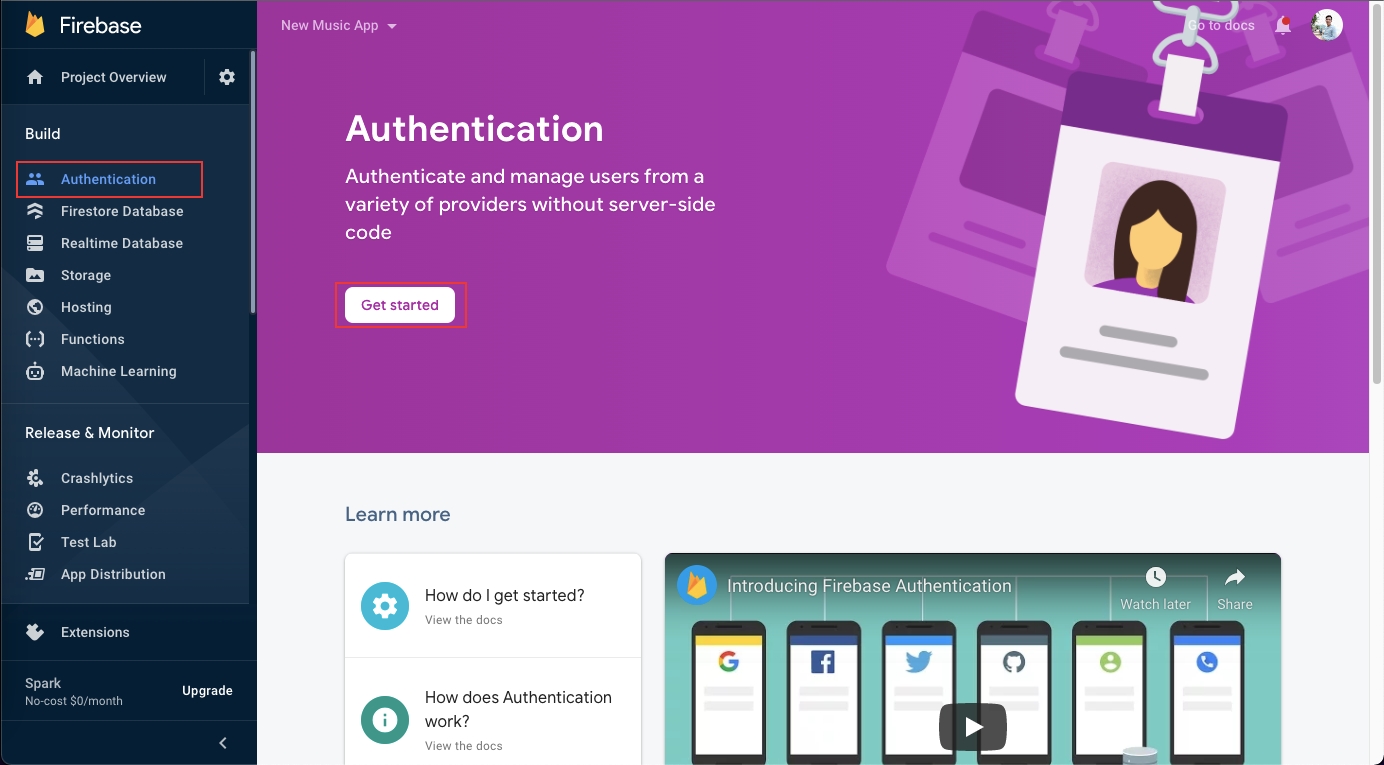
4: How to setup login system from Gmail account
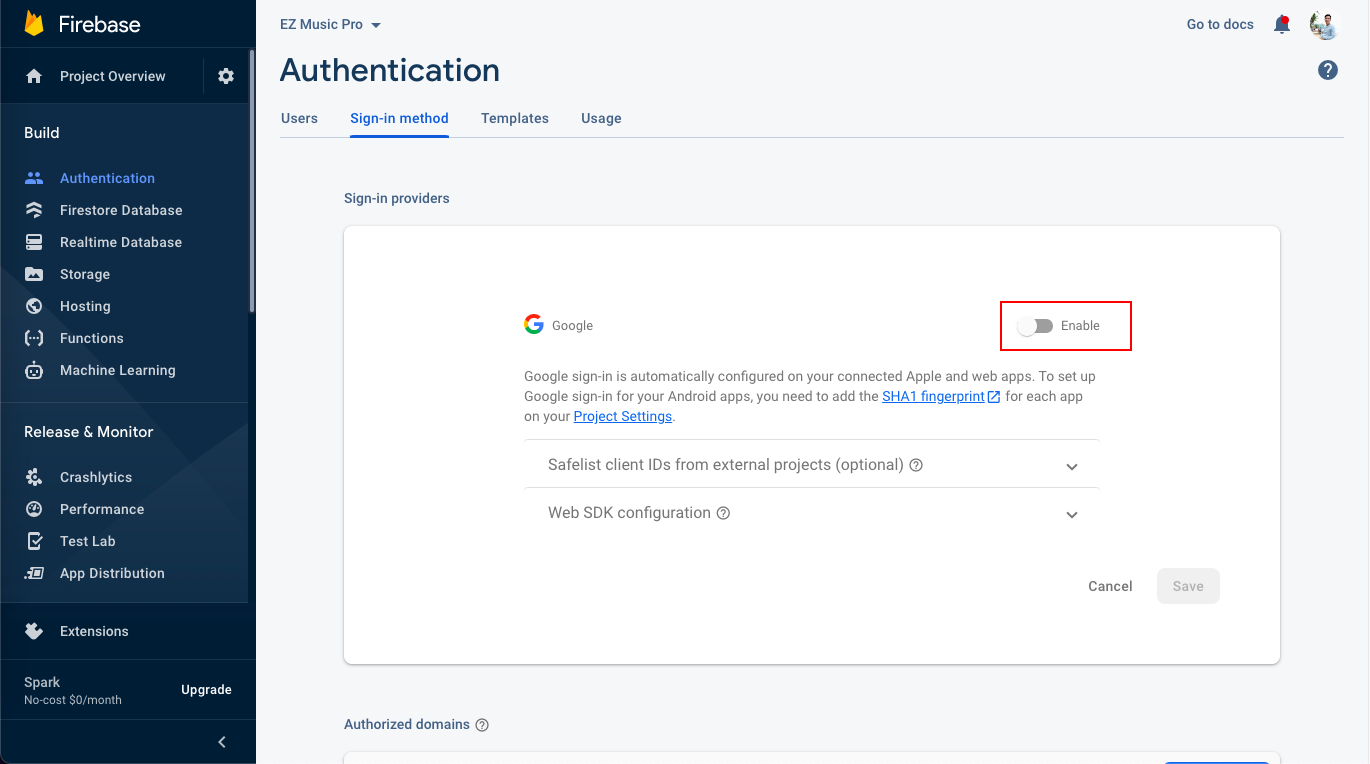
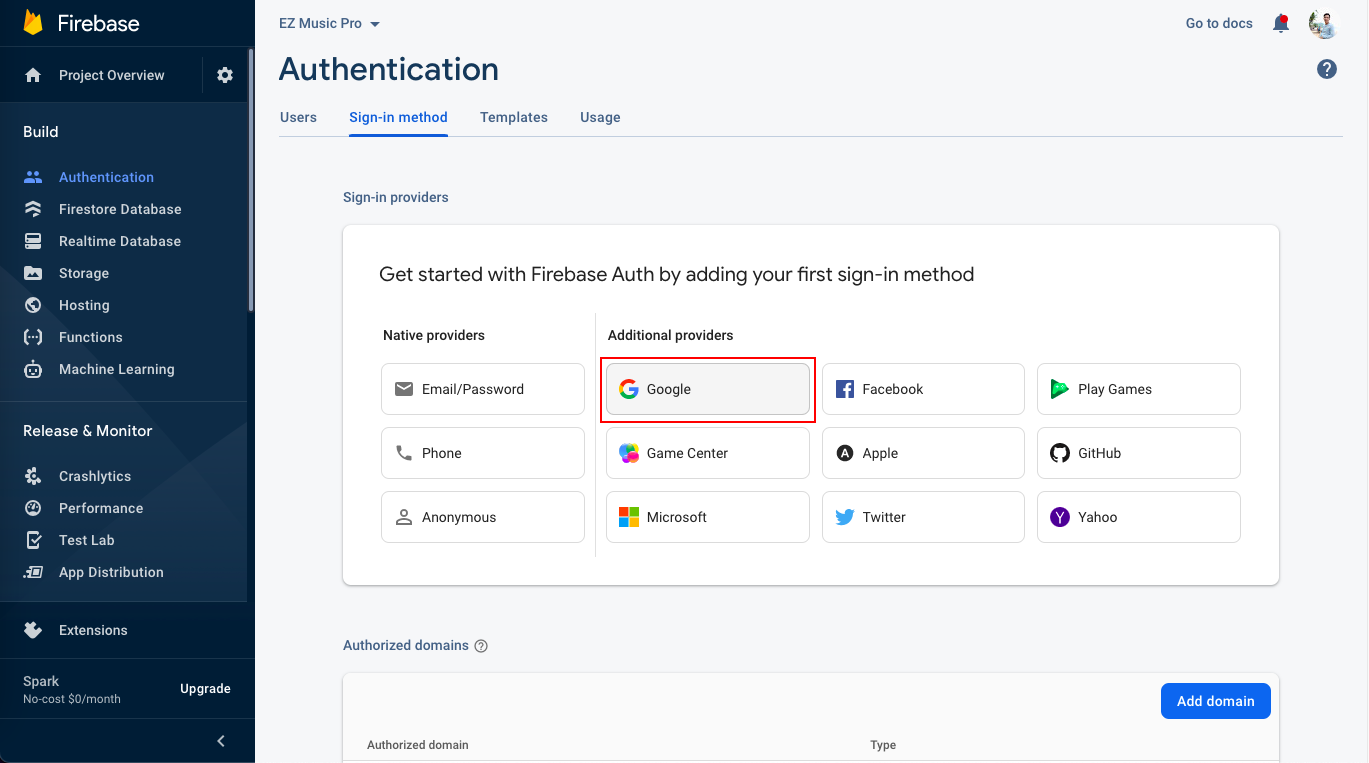
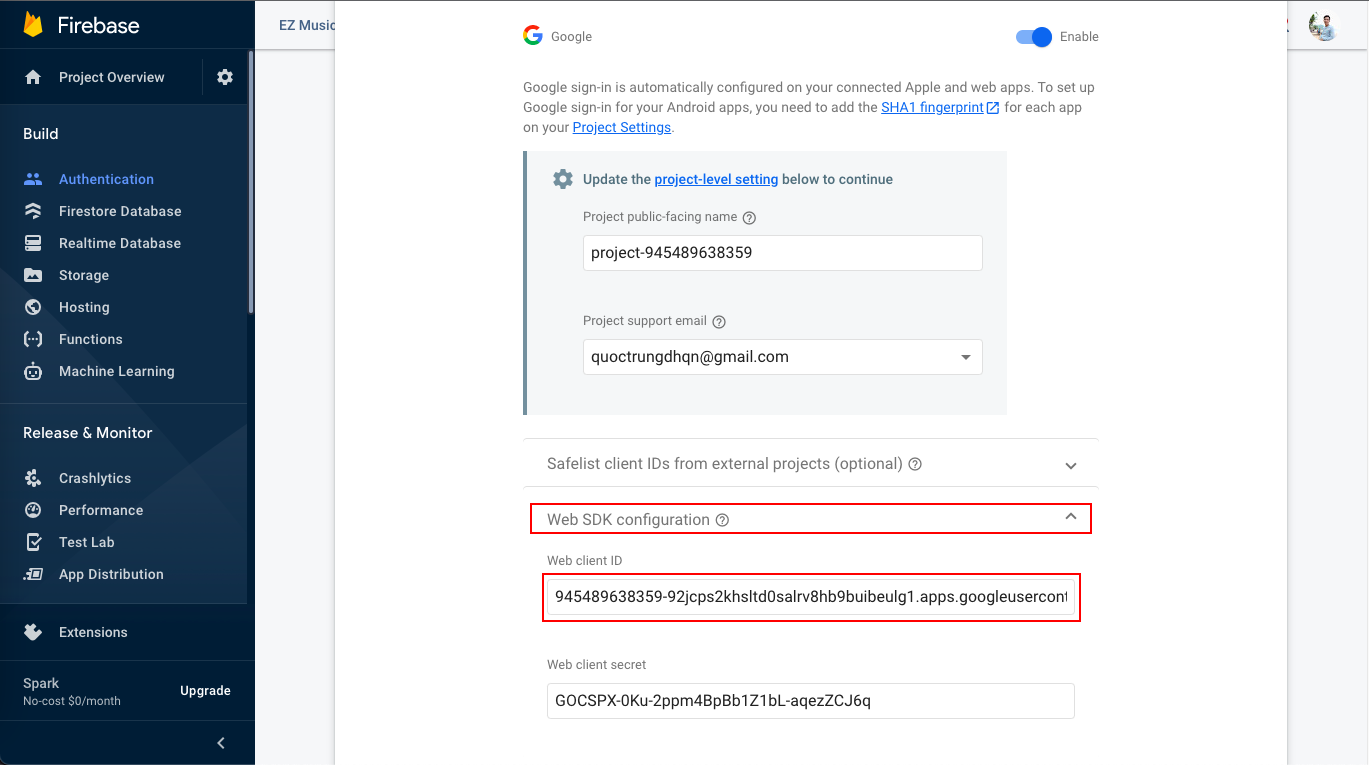
Get started with Firebase Auth by selecting the Google sign-in method.
Hit the "Enable" button to enable Google sign-in.
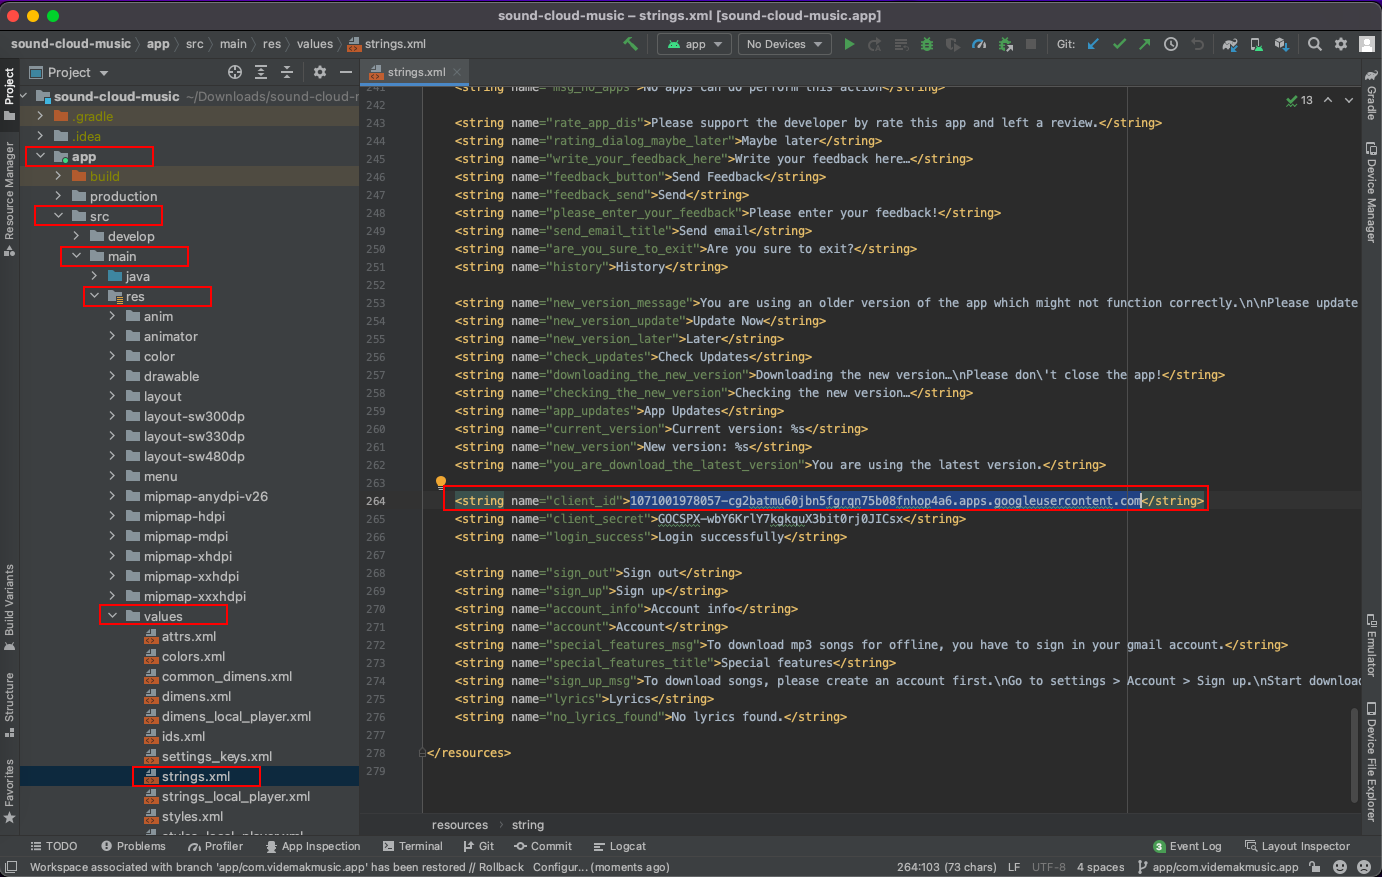
Copy the "Web client ID" from the Web SDK configuration
Then replace the "client_id" value in this path: "app/src/main/res/values/strings.xml"
Next, we will configure the SHA-1 certificate, re-download the google-services.json file, and copy/paste it into the project again.
How to create SHA certificate fingerprints
After completing all steps from 1 -> 8, you need to build the app and release it on the play store. Refer to steps 9 or 10 in the Release on Playstore section.
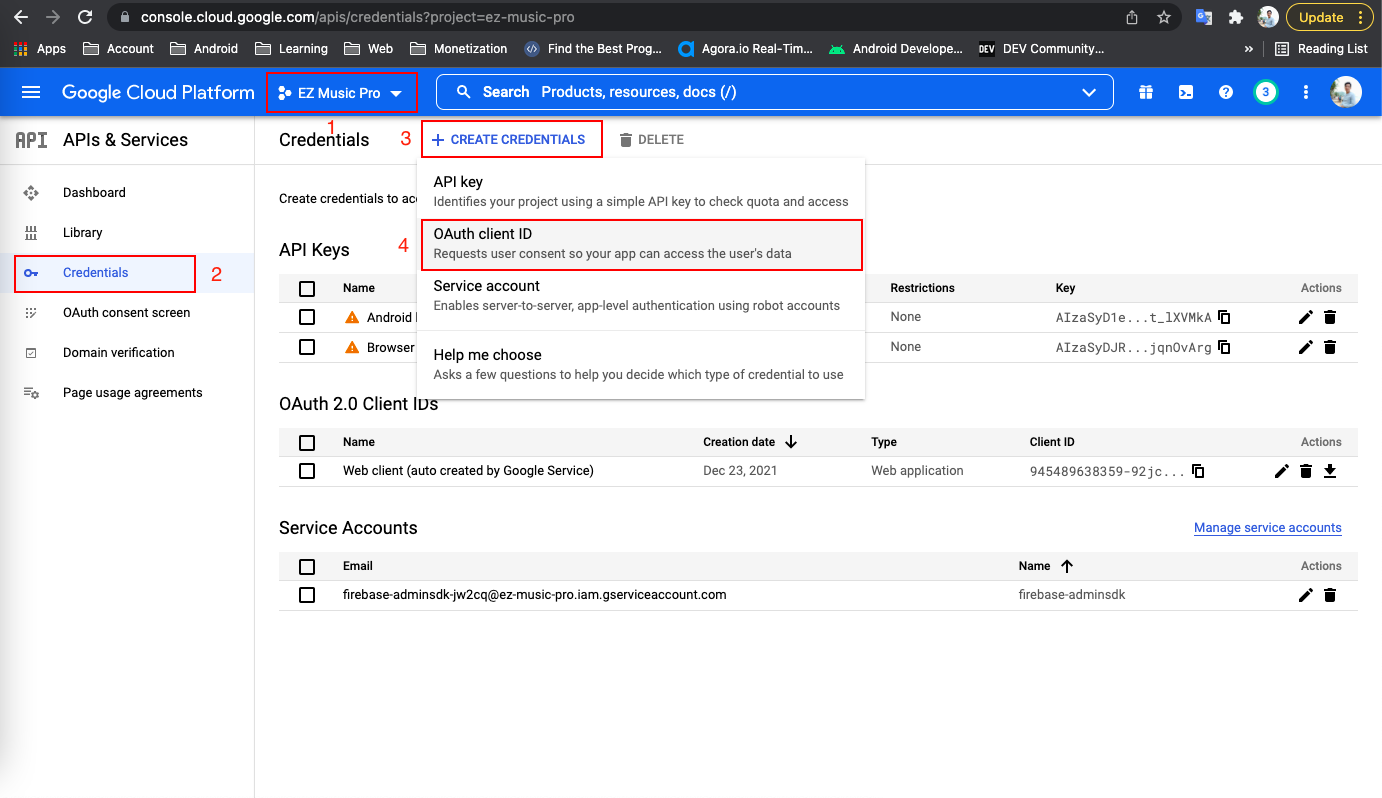
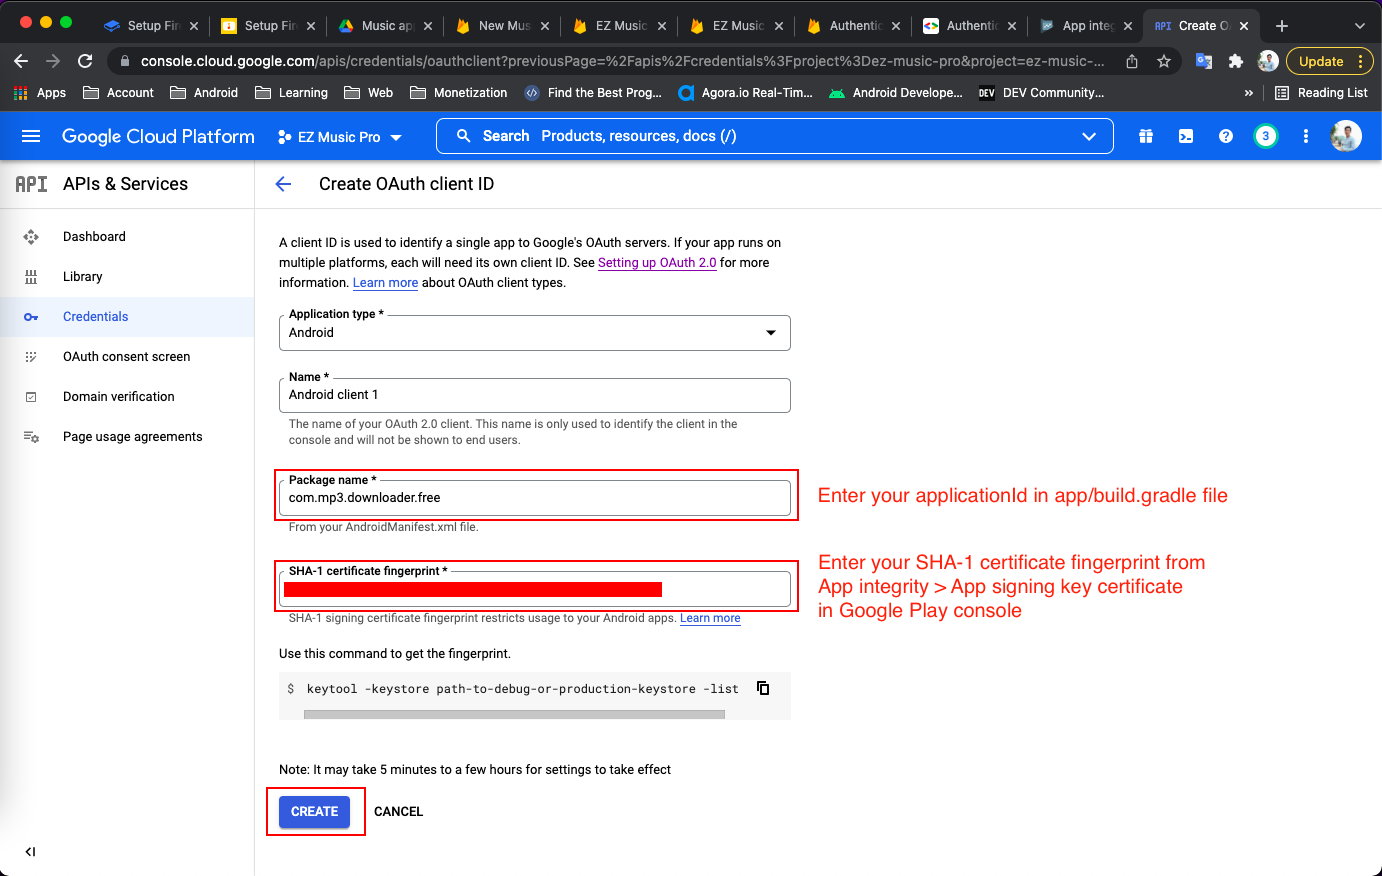
If there is no Android client for your app, you can create a new one. If already have an Android client, you just need to edit it by replacing the SHA-1 certificate fingerprint from App integrity in the play console.
Create credentials OAuth client ID.
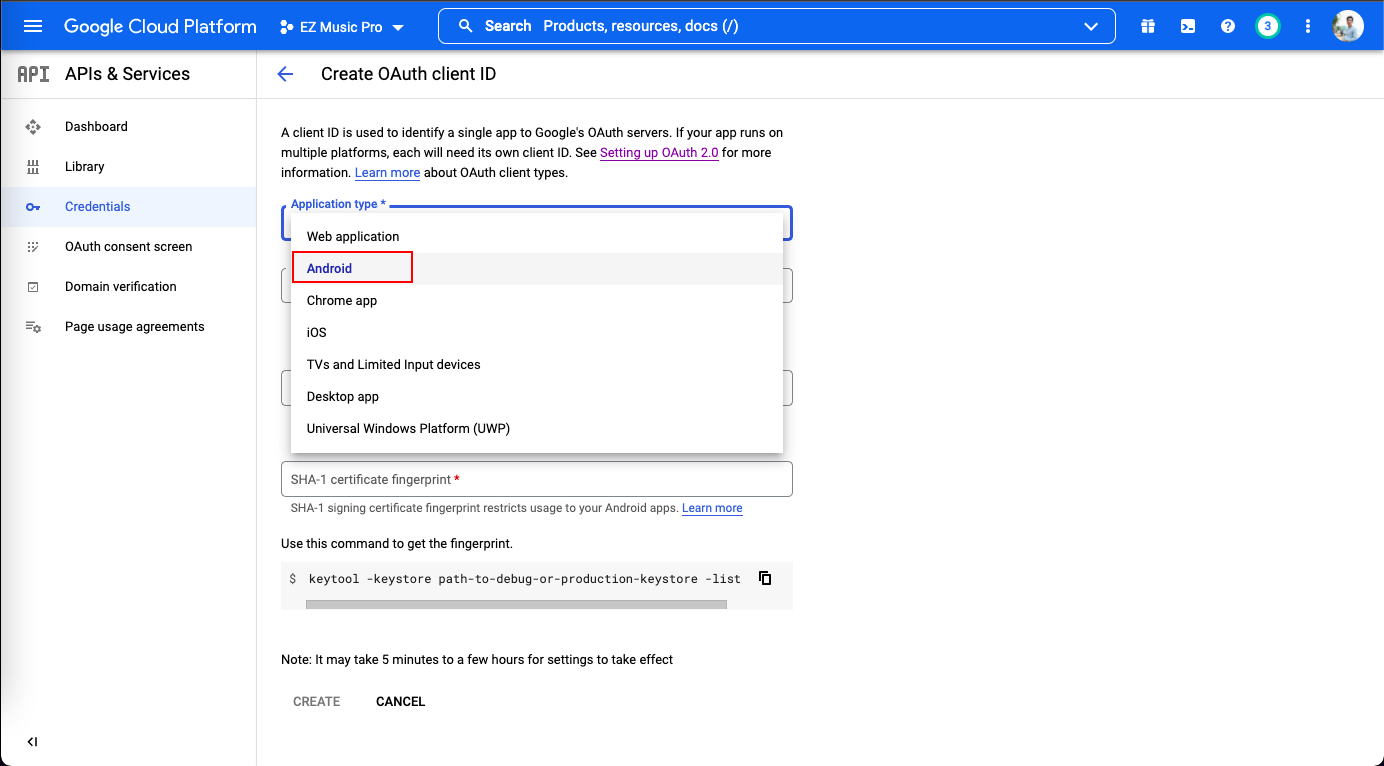
Select Application type is Android.
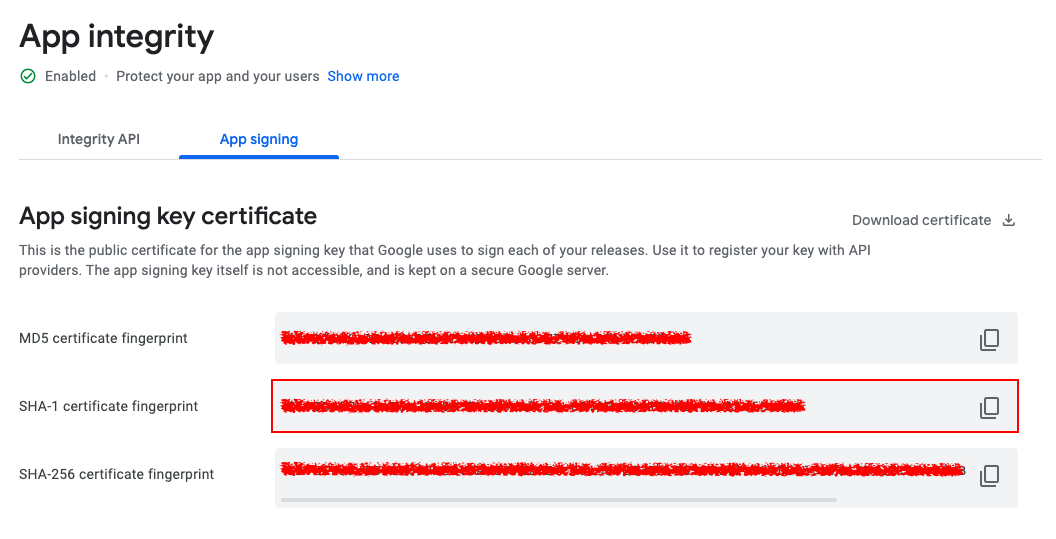
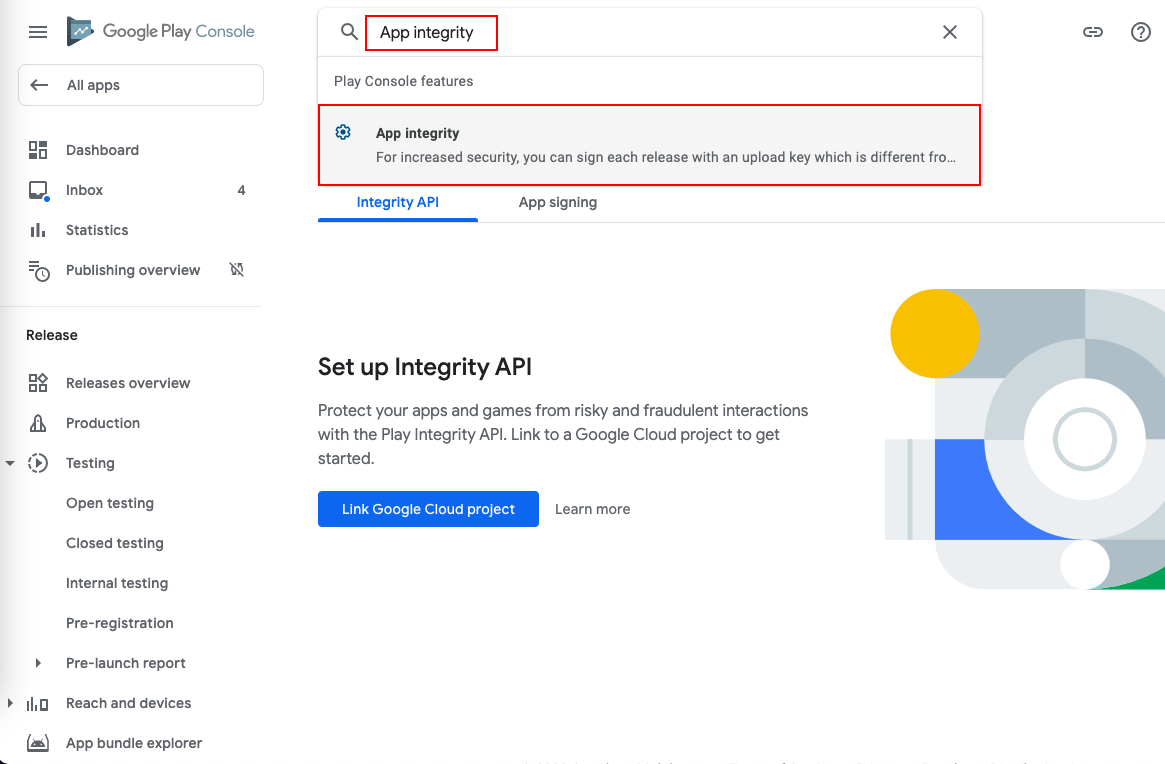
Select App integrity in your play console.
Copy SHA-1 certificate fingerprint when you uploaded the app successful on the play store.
Insert your applicationId and SHA-1 certificate fingerprint from previous step.
Last updated